Alright, so I wanted to draw a golf ball today because honestly, those tiny dimples always looked impossible to get right. Grabbed my sketchpad and pencil thinking it’d take hours, but found this stupid simple four-step method.
Step 1: Outline the basic circle
Started by just scratching a regular circle shape. Didn’t even use a stencil – just freehanded it wobbly-style. Made it kinda big cause small details freak me out. Pro tip: press super light so you can erase mess-ups. Mine looked like a squashed tomato at first.
Step 2: Dot bombing for dimples
This part felt weird. Instead of trying to draw perfect little holes, I just grabbed my pencil and made random dots inside the circle. Like sprinkle chaos but sorta evenly? Left more space near the center. The uglier the dots looked, the more real they seemed later. Trust the process, I guess.
Step 3: Shadow magic
Put my desk lamp sideways. Took the pencil and rubbed shadows on the bottom-left edge of each dot. Not heavy – just tiny crescent smudges. For the ball itself, shaded the whole bottom curve like it’s hiding from light. Blended with my finger til it looked grubby but dimensional.
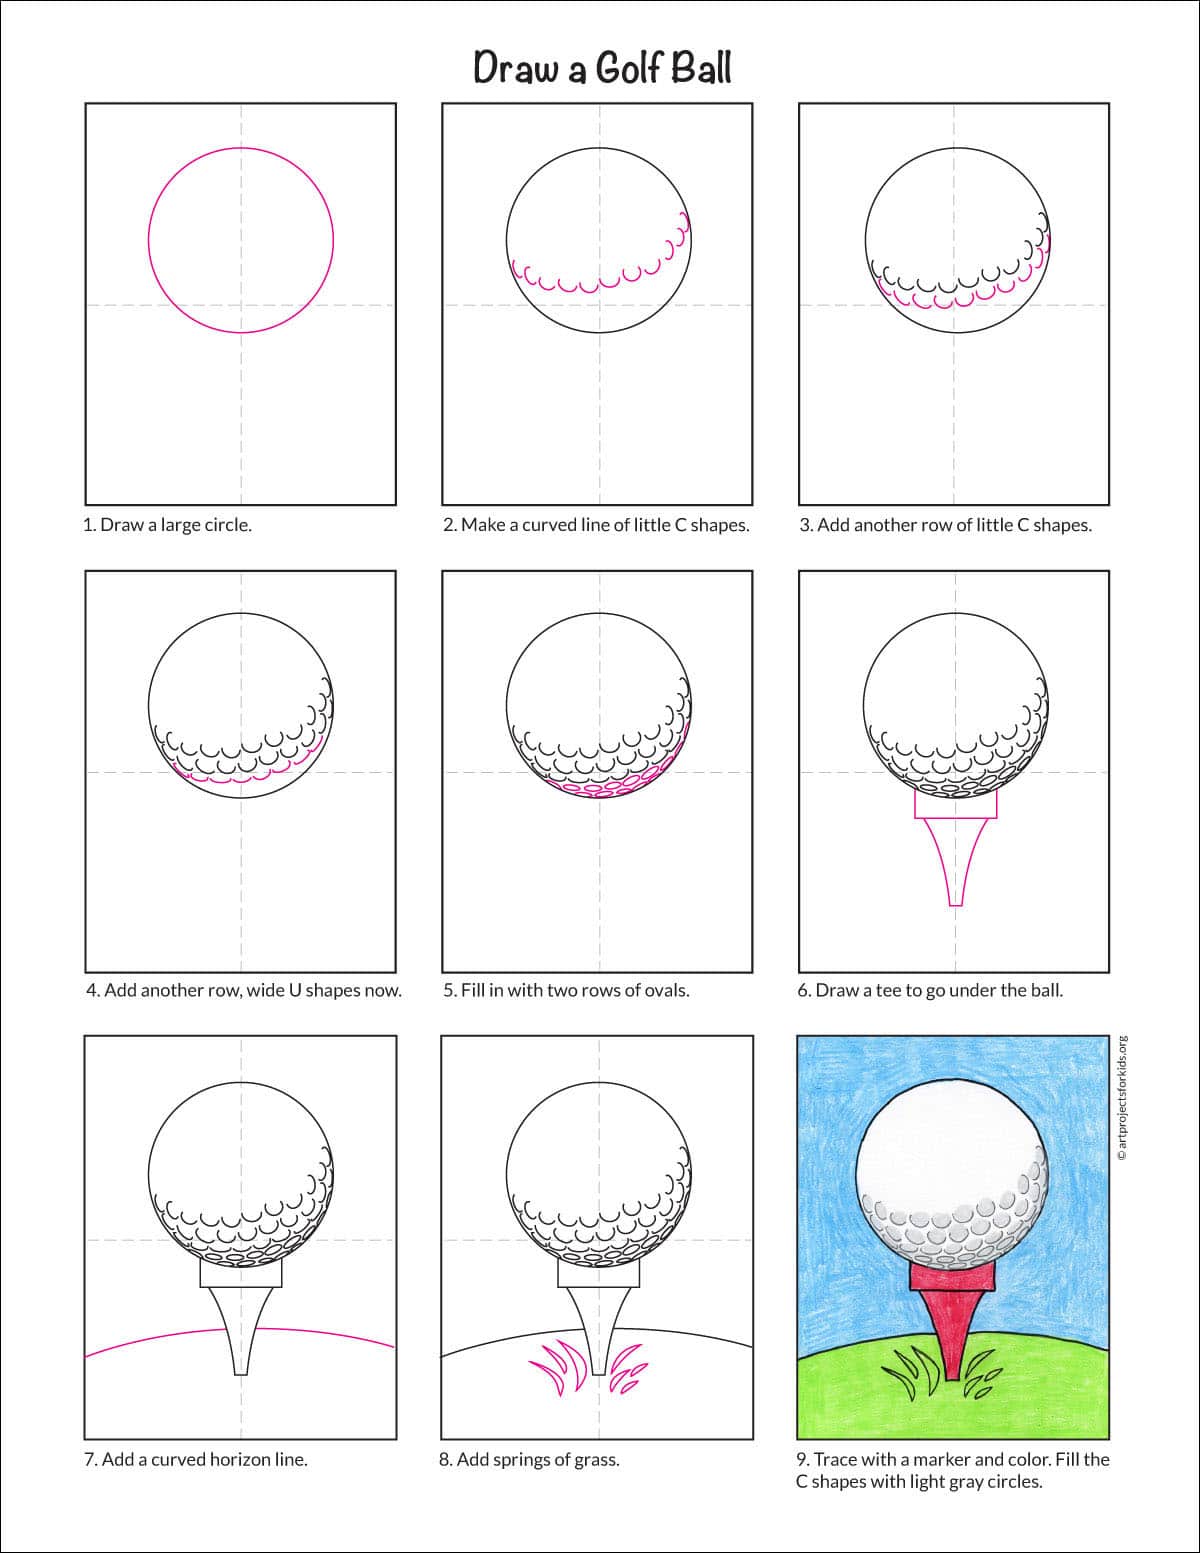
Step 4: Fixing disasters
My shading went muddy so I grabbed the eraser. Lightly swiped highlights on top-right dimple edges and the ball’s upper curve. That pop suddenly made it 3D! Darkened a couple key shadows near the bottom. Signed it before I could overthink.
Whole thing took 15 minutes start to finish. Sketch’s pinned on my fridge now – looks legit next to my kid’s dinosaur drawings. Who knew golf balls were easier than T-rexes?