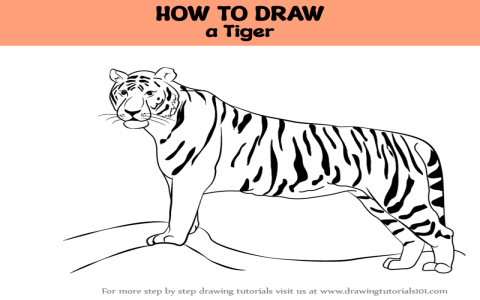
Alright folks, grab your pencils, today’s a drawing day. Wanted something cool for the wall, figured why not a tiger? Found this “simple” step-by-step tutorial online promising an easy tiger. Buckle up.
Grabbed My Stuff
- Pencils: Just my usual HB for sketching, a 2B for darker lines later.
- Paper: Standard drawing pad I had lying around.
- Eraser: My trusty kneaded one – gets messy but works.
- Sharpener: Obviously, gotta keep that point sharp.
Felt ready. Let’s see how simple it really is.
Starting the Sketch – Circle City
The tutorial said begin with circles. Yeah, lots of them.
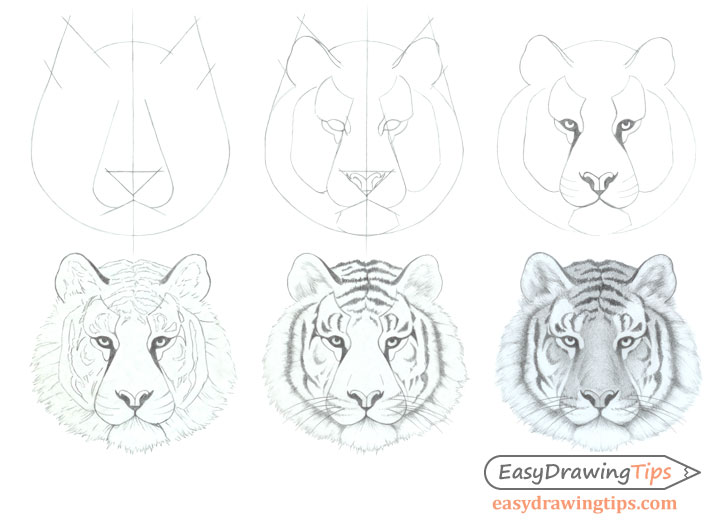
First, sketched a big circle right smack in the middle for the head. Felt awkward, too perfect maybe? Squished it a bit sideways, tigers ain’t perfectly round. Then, two smaller circles overlapping the sides for the cheeks. Looked goofy at first, like a weird puffed-up face.
Next step: guide lines. Drew a faint vertical line down the big circle, splitting it. Then a horizontal one across the middle. This felt okay, helps place the face stuff. Where the lines crossed – that’s supposed to be roughly the nose area. Added a smaller circle below the big one for the muzzle/snout. Things were getting crowded.
Time for body basics. Drew a big oval stretching back from the head circle – the main body mass. Connected it kinda sloppily to the head. Felt clunky. Then, another thinner oval at the bottom, almost like a bent sausage, for the hind leg? Added a rough curve forward for the chest and belly. Was it proportioned right? Honestly, no clue, just followed the steps blindly.
Legs and tail came next. Simple lines: front legs sorta straight down, hind legs bent like they’re crouching a bit. The tail? Just a long, flowing curve starting near the back oval. My sketch looked like a stretched-out cat with weirdly placed legs at this point. Definitely not roaring power.
Shaping the Beast – Lines Matter
Okay, time to turn those circles and ovals into something tiger-ish. Used my pencil to start connecting shapes, defining the head shape over the circles. Made the jaw line firmer. This is where it started resembling a head!
Worked on the muzzle, shaping it more like a box with a flat-ish top. Tapered the snout circle. Then, the eyes. Placed them above the horizontal guide line. Made them kinda almond-shaped, slanted upwards. Pupils came later. Sketching lightly here was key.
Ears went on top – simple triangles pointing slightly outward. Not flat on the head, has that alert look.
Moved down to the body. Defined the shoulders and back more clearly over the main oval. Connected the chest curve smoothly. Started shaping the legs, making them thicker at the top, thinner at the bottom. Drew the paws super basic, just curved mounds with hints of toes.
Refined that tail curve, made it thicker at the base, tapering to a point. Started getting the outline feeling more solid.
The Signature Stripes – Make or Break
Now for the fun part – adding those tiger stripes! The tutorial emphasized: they ain’t solid lines, they’re clumps of fur.
Went along the head first. Drew curved stripes starting from the outer edges, flowing towards the center. For the face stripes, focused around the eyes and down the muzzle. Kept it rough, varying thickness. Didn’t make them perfectly identical – that would look weird.
Body stripes were trickier. Needed to follow the form. Along the back? Longer, flowing stripes bending with the spine. Down the sides? Shorter, often broken-up stripes. Around the legs? Vertical-ish strips.
Used my 2B pencil here to darken them, pressing a bit harder but trying to keep the edges slightly fuzzy to look furry. Felt messy at times, erased a few wonky ones. Important part: stripes aren’t random lines, they wrap around the body like contours.
Added some smaller, lighter stripes within larger areas too. Felt like it needed that texture.
Finishing Touches – Shading & Snarl
Almost there. Time to add depth.
Started lightly shading underneath the body for a simple shadow, grounding him. Added darker areas under the head and where the legs meet the body. Mostly on one side to suggest light coming from the other.
Defined the nose – a bit like a stretched “W” shape at the end of the snout. Shaded it dark. Little curve above for the nose bridge.
Added whisker dots along the muzzle sides. Drew simple thin lines for whiskers – quick flicks of the pencil.
Final darkening pass. Went over the pupils solid black (leaving a tiny white spot!). Darkened the inside ears and some shadow areas a bit more. Darkened key stripes again. Refined any messy sketch lines.
Done! Simple? Sorta.
Stepped back. Is it perfect? Heck no. One front leg looks slightly thicker than the other, and maybe the snout is a tad too long. But overall? Yeah, that’s definitely a tiger! The step-by-step made it manageable.
Biggest takeaway: patience with those initial shapes and not overdoing the stripes early. Letting the form guide you. It felt pretty good seeing it come together step by step, even if “simple” is always relative. Took me a solid hour, maybe more. Got some graphite smudges on my hand too – always the sign of effort. Maybe I’ll frame it after all.